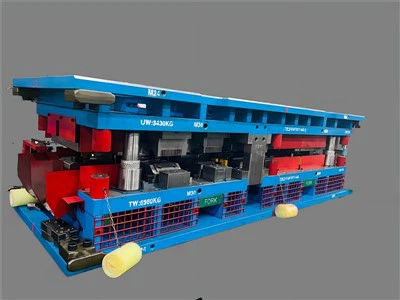
Hey there! As a checking fixture supplier, I'm super stoked to walk you through the process of installing a checking fixture. Whether you're new to the game or just need a refresher, this guide'll help you get the job done right.
Understanding the Basics
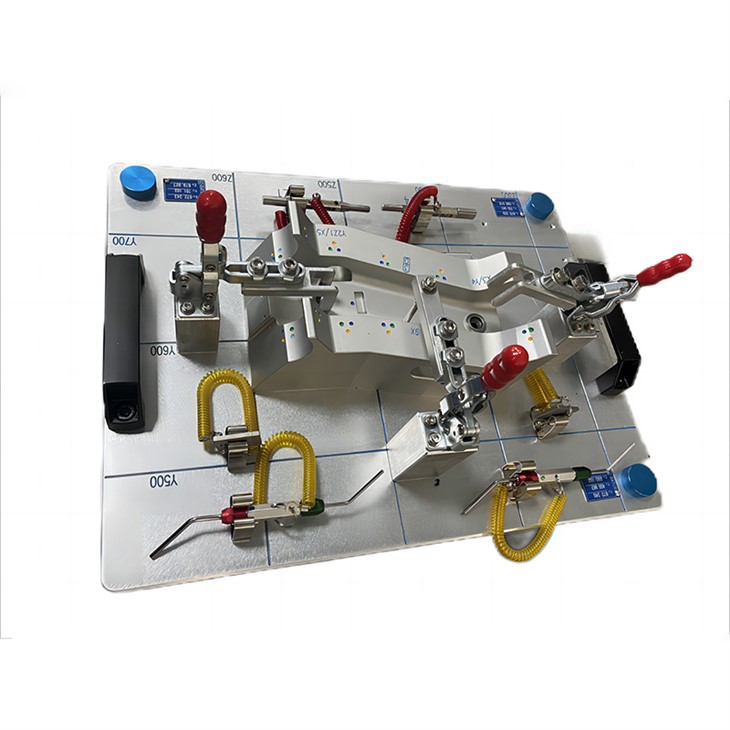
First things first, let's talk about what a checking fixture is. It's a specialized tool used to verify the dimensions, shape, and position of a part. Checking fixtures are crucial in industries like automotive, aerospace, and manufacturing, where precision is key. They help ensure that parts meet the required specifications, which in turn improves product quality and reduces waste.
There are different types of checking fixtures, each designed for specific applications. For example, you've got Checking Fixture Components, which are the building blocks for creating custom fixtures. Then there's the Jig Checking Fixture, which is used to hold a part in place during machining or assembly. And of course, the Automotive Checking Fixture, which is specifically tailored for the automotive industry.
Preparing for Installation
Before you start installing the checking fixture, you need to do some prep work. This'll make the installation process smoother and more efficient.
Gather Your Tools
You'll need a few basic tools for the installation, including a drill, screwdriver, wrenches, and a measuring tape. Make sure all your tools are in good working condition and that you have the right sizes for the job.
Choose the Right Location
The location where you install the checking fixture is important. It should be a clean, flat, and stable surface that can support the weight of the fixture and the part being checked. Avoid areas with excessive vibration, heat, or moisture, as these can affect the accuracy of the fixture.
Review the Installation Instructions
Every checking fixture comes with installation instructions. Make sure you read these carefully before you start the installation. The instructions'll provide you with detailed steps on how to assemble and install the fixture, as well as any specific requirements or precautions.
Installing the Checking Fixture
Now that you're all prepped, it's time to start installing the checking fixture. Here's a step-by-step guide to help you through the process.
Step 1: Unpack and Inspect the Fixture
Carefully unpack the checking fixture and inspect it for any damage or missing parts. If you find any issues, contact your supplier right away.
Step 2: Position the Fixture
Place the checking fixture on the chosen location and use a measuring tape to ensure it's properly aligned. Make sure the fixture is level and that it's positioned in the correct orientation for the part being checked.
Step 3: Secure the Fixture
Once the fixture is in position, use the appropriate fasteners to secure it to the surface. This may involve drilling holes and using bolts or screws. Make sure the fasteners are tightened securely, but be careful not to overtighten them, as this can damage the fixture or the surface.
Step 4: Install the Components
If your checking fixture comes with additional components, such as clamps, gauges, or sensors, install these according to the instructions. Make sure each component is properly aligned and tightened.

Step 5: Connect the Electrical or Pneumatic Systems (if applicable)
Some checking fixtures may require electrical or pneumatic connections. If this is the case, follow the instructions to connect the systems safely. Make sure all connections are secure and that there are no leaks.
Step 6: Calibrate the Fixture
After the fixture is installed and all the components are connected, it's time to calibrate it. Calibration is the process of adjusting the fixture to ensure it provides accurate measurements. Follow the calibration instructions provided by the manufacturer to set up the fixture correctly.
Testing the Fixture
Once the checking fixture is installed and calibrated, it's important to test it to make sure it's working properly. Here's how you can do it.
Step 1: Check the Alignment
Use a precision measuring tool, such as a coordinate measuring machine (CMM), to check the alignment of the fixture. Make sure all the measuring points are within the specified tolerance.
Step 2: Test the Functionality
Use a sample part to test the functionality of the checking fixture. Place the part in the fixture and check if the gauges, sensors, or other measuring devices provide accurate readings. If there are any issues, adjust the fixture or the components as needed.
Step 3: Repeat the Tests
To ensure the reliability of the checking fixture, repeat the tests several times with different parts. This'll help you identify any potential issues and ensure the fixture provides consistent results.
Maintenance and Care
To keep your checking fixture in good working condition, it's important to perform regular maintenance and care. Here are some tips to help you do it.
Clean the Fixture Regularly
Use a clean, dry cloth to wipe down the checking fixture after each use. This'll remove any dirt, debris, or contaminants that could affect the accuracy of the fixture.
Lubricate the Moving Parts
If your checking fixture has moving parts, such as clamps or hinges, lubricate them regularly to ensure smooth operation. Use a lubricant recommended by the manufacturer.
Inspect the Fixture for Damage
Regularly inspect the checking fixture for any signs of damage, such as cracks, dents, or wear. If you find any issues, repair or replace the damaged parts as soon as possible.
Store the Fixture Properly
When the checking fixture is not in use, store it in a clean, dry place. Protect it from dust, moisture, and other environmental factors that could damage the fixture.
Conclusion
Installing a checking fixture may seem like a daunting task, but with the right preparation and a step-by-step approach, it can be a relatively straightforward process. By following the guidelines outlined in this blog post, you'll be able to install your checking fixture correctly and ensure it provides accurate and reliable measurements.
If you're in the market for a checking fixture or have any questions about the installation process, don't hesitate to reach out. We're here to help you find the right solution for your needs and ensure a smooth installation. Whether you're looking for Checking Fixture Components, Jig Checking Fixture, or Automotive Checking Fixture, we've got you covered. Contact us today to start the conversation and take your quality control to the next level.
References
- Manufacturer's installation and operation manuals for checking fixtures
- Industry standards and best practices for checking fixture installation and use