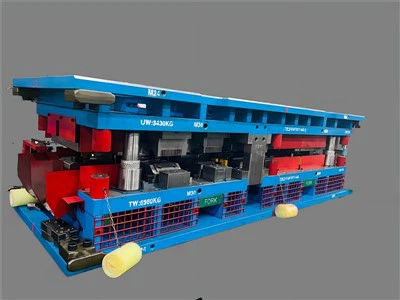
Hey there! As a checking fixture supplier, I've seen my fair share of situations where existing checking fixtures need some modifications. Whether it's due to design changes in the part being inspected, new quality requirements, or just a need for better efficiency, modifying a checking fixture can be a game - changer. In this blog, I'll walk you through the steps on how to modify an existing checking fixture.
Step 1: Identify the Problem
The first thing you gotta do is figure out what's wrong with the current checking fixture. Is it not measuring the part accurately? Maybe it's difficult to use, or perhaps it can't keep up with the new production volume. Talk to the people who use the fixture daily, like the operators on the production line. They can give you some real - world insights into what's working and what's not.
For example, if you're dealing with an Automotive Checking Fixture, the operators might notice that the fixture doesn't hold the car part in place properly during inspection. This could lead to inaccurate measurements and wasted time. Once you've identified the problem, you can start thinking about solutions.
Step 2: Gather Information
After you've pinpointed the issue, it's time to gather all the relevant information. You'll need the original design documents of the checking fixture, including blueprints, CAD models, and any specifications. This will give you a good understanding of how the fixture was built and what its intended functions are.
You should also collect data on the part being inspected. Know its dimensions, tolerances, and any new design features. If there have been changes to the part's material or manufacturing process, that information is crucial too. For instance, if the part is now made from a different alloy, it might have different physical properties that could affect how it's inspected.


Step 3: Develop a Modification Plan
With all the information in hand, it's time to come up with a plan for the modification. Start by brainstorming possible solutions. You might need to add or remove some components, change the fixture's clamping mechanism, or adjust the measurement sensors.
When considering components, take a look at Checking Fixture Components. There are a wide variety of components available that can be used to enhance the functionality of your checking fixture. For example, if you need more accurate measurements, you could consider upgrading to high - precision sensors.
Once you've got a few ideas, evaluate each one based on factors like cost, feasibility, and the impact on the fixture's performance. Choose the solution that best meets your requirements and create a detailed plan. This plan should include a list of the parts you'll need, the steps involved in the modification process, and a timeline.
Step 4: Obtain Necessary Approvals
Before you start making any changes to the checking fixture, you need to get the necessary approvals. This might involve getting sign - off from your company's management, the quality control department, or even the customer if the fixture is being used for a specific client project.
Present your modification plan clearly, highlighting the benefits of the changes. Explain how the modifications will improve the accuracy of the inspections, increase efficiency, or meet new quality standards. Make sure to address any concerns they might have, such as the cost and the potential downtime during the modification process.
Step 5: Source the Parts
Once you have the approvals, it's time to source the parts needed for the modification. You can either order them from your regular suppliers or look for new ones if you need specialized components. Make sure to order the parts well in advance to avoid any delays in the modification process.
When sourcing parts, pay attention to the quality. Using high - quality components will ensure that the modified checking fixture performs reliably and has a long service life. You can refer to Jig Checking Fixture for more information on the types of parts commonly used in checking fixtures.
Step 6: Modify the Fixture
Now comes the actual modification process. Follow your detailed plan step by step. If you're not experienced in fixture modification, it might be a good idea to have an experienced technician or engineer oversee the work.
During the modification, make sure to document every step. Take photos, record measurements, and note any changes you make. This documentation will be useful for future reference, especially if you need to make further modifications or if there are any issues with the modified fixture.
Step 7: Test and Validate
After the modification is complete, it's crucial to test and validate the checking fixture. Use a sample of the parts being inspected and perform a series of tests to ensure that the fixture is working correctly. Check the accuracy of the measurements, the stability of the clamping mechanism, and the overall functionality of the fixture.
Compare the test results with the original requirements and the new specifications. If there are any discrepancies, go back and make the necessary adjustments. Keep testing and adjusting until the fixture meets all the requirements.
Step 8: Train the Operators
Once the checking fixture has been successfully modified and validated, it's time to train the operators who will be using it. Provide them with detailed instructions on how to use the modified fixture, including any new features or procedures.
Make sure the operators understand the importance of following the correct inspection procedures and how the modifications will affect their work. You can also conduct hands - on training sessions to give them practical experience with the new fixture.
Step 9: Monitor and Maintain
Even after the fixture is up and running, your job isn't done. You need to monitor its performance regularly to ensure that it continues to work correctly. Set up a maintenance schedule to perform routine checks and maintenance tasks, such as cleaning, lubricating, and calibrating the sensors.
Keep an eye on the inspection data to detect any trends or issues early. If you notice any problems, address them immediately to prevent further damage or inaccurate inspections.
In conclusion, modifying an existing checking fixture is a multi - step process that requires careful planning, attention to detail, and proper execution. By following these steps, you can ensure that your checking fixture is modified successfully and continues to meet your inspection needs.
If you're in the market for checking fixtures or need help with modifying your existing ones, don't hesitate to reach out. We're here to provide you with the best solutions and support for all your checking fixture requirements. Let's start a conversation and see how we can work together to improve your inspection processes.
References
- General knowledge and experience in the field of checking fixture manufacturing and modification.
- Industry best practices for checking fixture design and maintenance.