Hey there, fellow auto enthusiasts! As a supplier of Auto Upper Body Parts, I've seen my fair share of damaged components, and one that often comes up is the cowl. In this blog, I'm gonna walk you through how to replace a damaged cowl in auto upper body parts.
What is a Cowl?
First things first, let's talk about what a cowl is. The cowl is that part of the car that sits between the windshield and the hood. It's an important component because it helps to keep water, debris, and other stuff from getting into the engine compartment and the cabin. It also provides support for the windshield and helps to direct airflow over the car.
Why Replace a Damaged Cowl?
There are a few reasons why you might need to replace a damaged cowl. Maybe it's been hit by a rock or other debris on the road, or perhaps it's just worn out from years of use. A damaged cowl can lead to all sorts of problems, like water leaks into the cabin, which can cause mold and mildew. It can also affect the performance of your car's ventilation system and even cause damage to other components under the hood.
Tools You'll Need
Before you start replacing the cowl, you'll need to gather a few tools. Here's a list of what you'll probably need:
- Socket and wrench set
- Screwdriver set (both flathead and Phillips)
- Pry bar
- Sealant
- Safety glasses and gloves
Step-by-Step Guide to Replacing a Damaged Cowl
Step 1: Prepare Your Car
Park your car on a flat, stable surface and engage the parking brake. Make sure the engine is cool before you start working. You might also want to disconnect the battery to avoid any electrical issues.
Step 2: Remove the Old Cowl
Start by removing any parts that are covering the cowl, like the windshield wipers and the plastic trim pieces. Use your socket and wrench set to remove the bolts that are holding the cowl in place. Some cars might have screws instead, so use your screwdriver for those. Once you've removed all the fasteners, gently pry the cowl away from the car using a pry bar. Be careful not to damage the surrounding areas.
Step 3: Clean the Area
After you've removed the old cowl, take some time to clean the area where the new cowl will be installed. Remove any dirt, debris, or old sealant. You can use a clean cloth and some mild detergent to do this. Make sure the area is completely dry before you proceed.
Step 4: Install the New Cowl
Take your new cowl and align it with the mounting points on your car. Carefully insert the bolts or screws and tighten them using your socket or screwdriver. Make sure the cowl is sitting flush against the car and that all the fasteners are tightened securely.
Step 5: Apply Sealant
To prevent water leaks, apply a bead of sealant around the edges of the cowl where it meets the car. This will help to create a watertight seal. Make sure to follow the manufacturer's instructions when applying the sealant.
Step 6: Reinstall the Trim and Wipers
Put back all the trim pieces and the windshield wipers that you removed earlier. Make sure they are installed correctly and working properly.
Step 7: Reconnect the Battery
Once you've completed the installation, reconnect the battery. Start your car and check for any leaks or other issues.
The Importance of Quality Parts
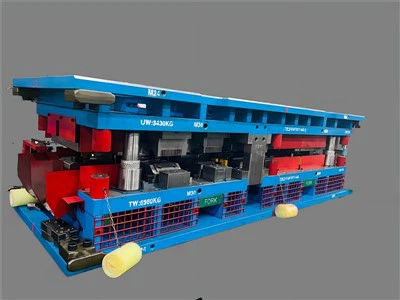
When it comes to replacing the cowl or any other auto upper body parts, it's really important to use high-quality parts. At our company, we understand the importance of quality, which is why we offer a wide range of top-notch Auto Upper Body Parts. We also provide Custom Stamping Dies, Automotive Progressive Die, and Sheet Metal Stamping Dies to ensure that our parts are made to the highest standards.


Conclusion
Replacing a damaged cowl in auto upper body parts might seem like a daunting task, but with the right tools and a little patience, you can do it yourself. Remember, if you're not comfortable doing it on your own, it's always a good idea to take your car to a professional mechanic.
If you're in the market for high-quality Auto Upper Body Parts, including cowls, don't hesitate to reach out to us. We're here to help you find the right parts for your car and ensure that your vehicle is in top-notch condition. Whether you're a DIY enthusiast or a professional mechanic, we've got the parts you need. Contact us today to start your procurement process and get the best deals on Auto Upper Body Parts.
References
- "Automotive Body Repair Manual"
- Various online automotive forums and communities