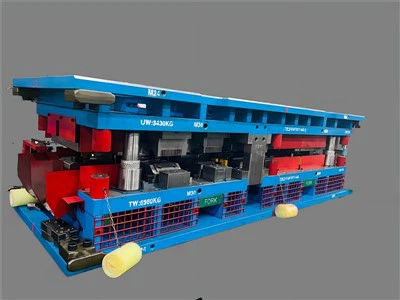
Hey there! As a supplier of single casting dies, I've been in the thick of it when it comes to understanding the ins and outs of these crucial components. One of the key aspects that often gets under the microscope, literally and figuratively, is analyzing the microstructural changes in a single casting die. In this blog, I'm gonna walk you through how to do just that.
Why Analyze Microstructural Changes?
First off, you might be wondering why it's even important to analyze these microstructural changes. Well, the microstructure of a casting die has a huge impact on its performance. It can affect things like hardness, toughness, and wear resistance. If you're using a die for mass production, even the slightest change in the microstructure can lead to issues like premature wear, cracking, or dimensional inaccuracies in the castings. So, by keeping a close eye on these changes, you can catch potential problems early and take steps to prevent costly downtime and product defects.
Step 1: Sample Preparation
The first step in analyzing microstructural changes is to prepare a sample from the casting die. This is a bit like taking a tiny slice of the die to study under a microscope. You wanna make sure the sample is representative of the areas you're interested in. For example, if you suspect there are issues near the surface of the die, you'll want to take a sample from that region.


To prepare the sample, you'll need to cut it out using a suitable cutting tool, like a saw or a wire cutter. Make sure to handle the sample carefully to avoid any damage that could affect the microstructure. Once you've got your sample, you'll need to grind and polish it to get a smooth surface. This is important because a rough surface can make it difficult to see the details of the microstructure. You can use a series of grinding papers with different grit sizes, starting with a coarse grit and working your way up to a fine grit. Then, finish off with a polishing compound to get a mirror-like finish.
Step 2: Microscopic Examination
Once your sample is prepared, it's time to take a look under the microscope. There are different types of microscopes you can use, depending on the level of detail you need. Optical microscopes are great for getting a general overview of the microstructure, while electron microscopes can provide much higher resolution images.
When you're looking at the sample under the microscope, you'll start to see different features of the microstructure. These can include grains, phases, and inclusions. Grains are like tiny crystals in the metal, and their size and shape can have a big impact on the properties of the die. Phases are different regions in the metal with distinct compositions and structures. Inclusions are foreign particles that can be present in the metal, and they can also affect the performance of the die.
You can use different techniques to enhance the contrast of the microstructure and make it easier to see. For example, you can etch the sample with a chemical solution to reveal the grain boundaries and other features. You can also use image analysis software to measure the size and shape of the grains and other features.
Step 3: Comparing with Reference Microstructures
To really understand the microstructural changes in your casting die, it's a good idea to compare it with reference microstructures. These can be microstructures of new dies or dies that are known to be in good condition. By comparing your sample with the reference microstructures, you can identify any differences and determine if there are any issues.
You can find reference microstructures in textbooks, research papers, or from other suppliers. You can also create your own reference library by taking samples from your own dies at different stages of their life cycle. This way, you'll have a good idea of what the normal microstructure of your dies looks like and can easily spot any deviations.
Step 4: Identifying Causes of Microstructural Changes
Once you've identified the microstructural changes in your casting die, the next step is to figure out what's causing them. There are several factors that can contribute to microstructural changes, including heat treatment, casting process parameters, and the environment in which the die is used.
Heat treatment is a process that's used to change the properties of the metal by heating and cooling it. If the heat treatment is not done correctly, it can lead to changes in the microstructure. For example, if the die is heated too quickly or cooled too slowly, it can cause the grains to grow larger, which can reduce the hardness and toughness of the die.
Casting process parameters, such as the pouring temperature, the cooling rate, and the pressure, can also affect the microstructure. If the pouring temperature is too high, it can cause the metal to solidify too quickly, which can lead to the formation of defects in the microstructure. On the other hand, if the cooling rate is too slow, it can allow the grains to grow larger, which can also affect the properties of the die.
The environment in which the die is used can also have an impact on the microstructure. For example, if the die is exposed to high temperatures or corrosive chemicals, it can cause the metal to oxidize or corrode, which can change the microstructure.
Step 5: Taking Corrective Actions
Once you've identified the causes of the microstructural changes, it's time to take corrective actions. This could involve adjusting the heat treatment process, changing the casting process parameters, or improving the environment in which the die is used.
If the issue is related to the heat treatment, you can work with your heat treatment provider to adjust the process parameters. For example, you might need to change the heating and cooling rates or the temperature at which the die is held. If the problem is with the casting process, you can work with your casting team to optimize the process parameters. This could involve adjusting the pouring temperature, the cooling rate, or the pressure.
If the environment is the cause of the problem, you can take steps to protect the die. For example, you can use a coating on the die to prevent oxidation or corrosion. You can also improve the ventilation in the area where the die is used to reduce the exposure to high temperatures and corrosive chemicals.
Related Links
If you're interested in learning more about die design and manufacturing, check out these links:
Conclusion
Analyzing the microstructural changes in a single casting die is an important part of ensuring the performance and longevity of the die. By following the steps outlined in this blog, you can identify any issues early and take corrective actions to prevent costly downtime and product defects.
If you're in the market for high-quality single casting dies or need help with analyzing the microstructural changes in your existing dies, don't hesitate to reach out. We're here to help you get the most out of your casting operations.
References
- Smith, J. (2018). Metallurgy for Dummies. Wiley.
- Jones, A. (2019). Casting Processes and Die Design. Elsevier.